Instructions
You can clear your computer of junk and speed up its operation if you delete unnecessary files not only into the Recycle Bin, but also from it as often as possible. Click on the “Trash” icon and select “Empty” or configure this operation to be performed automatically through the “Properties” menu. Next, go to the Start menu and open Control Panel. Select "Programs and Features" to proceed to the next stage of system cleaning.
Wait until the process of updating the list of installed applications on your hard drive is completed. Carefully study the list and remove all programs you do not use (if their functions are known and you were the one who installed the applications). This will significantly free up space on your hard drive. You can learn more about the status of the disks in the “My Computer” folder.
The Disk Cleanup system application, which is located in the folder with standard utilities in the Start menu, will help clean your computer of junk and speed up its operation. After launching, the application will check the status of the hard drive, after which it will suggest unnecessary components to remove and free up space on the hard drive. This includes various temporary files, memory dump components, and various data from the Internet.
System performance can be significantly degraded due to the presence of various viruses and malware. Be sure to periodically scan all storage media using any anti-virus program with updated databases. In addition, some programs on the hard drive cannot be completely removed manually, and they leave traces on the system that negatively affect the operation of the system. To thoroughly clean your hard drive and system registry, use any free application available for download on the Internet, such as CCleaner or Wise Registry Cleaner.
Complete the installation and launch the corresponding application. Go to the Windows Junk Cleanup feature and scan your system. Once everything is ready, click on the button to remove junk items. These programs include utilities to optimize system performance and enhance its security. Don't forget to configure the application to automatically diagnose and scan your system for junk and malicious elements every few days.
Viruses can cause irreparable harm to your personal computer. Therefore, to protect it, you should definitely install an antivirus program. There are quite a lot of them today. You can choose the one that will satisfy all your requirements. But what to do if your computer is already infected?
You will need
- - antivirus software.
Instructions
To determine if there is a virus on your computer, run an antivirus program. As practice shows, it is best to use licensed software, as it is more reliable and always updates the virus signature database. When the program loads, turn on your computer to scan for viruses. There are several ways to check. The first check is quick. When you run it, the antivirus program will scan only those files that constitute a risk group, that is, those programs that are most likely to be infected.
The second type of verification is partial or selective. With this scan, you can set yourself which files you want to check. And the last check is complete. During this scan, all programs and files on your computer are analyzed.
Enable full scan. Antivirus software will indicate in real time which folders or files are infected. Now you need to clean your computer. As a rule, after detecting a virus, the program itself makes a request, offering to treat or delete the infected file. Click "Treat" first. If it was not possible to get rid of the virus in this way, then click “Delete”. In this case, the infected file will be deleted from the computer. It’s better to lose one folder along with it than to put the PC itself at risk.
After cleaning your computer, check it regularly for viruses. Keep your antivirus program updated. Then your computer will be reliably protected from malware. Try not to click on dubious pages on the Internet, as some viruses can still penetrate the system.
Video on the topic
When buying a new computer, users are faced with the problem of a large number of installed programs that come with the package, but are completely unnecessary to them. You can remove unused utilities manually or let special software do it.

You will need
- PC Decrapifier utility.
Instructions
After turning on a completely new computer, the startup menu may contain a large number of unnecessary programs, which, accordingly, reduce its performance. Run the system setup utility to remove unnecessary items from startup. To do this, press the Win + R key combination, enter the msconfig command in the window that opens and click OK.
In the applet that appears, go to the “Startup” tab and uncheck the lines that you are sure are unnecessary. Click the Apply and Reboot Now buttons. After the system boots, you will see that the number of programs in the system tray will decrease significantly.
Now these programs need to be removed; to do this, use the Add or Remove Programs system add-on. Click the Start menu and select Control Panel. In the window that opens, double-click on the icon above the voiced element. Find unnecessary programs and click the "Replace/Remove" button.
This method is not a panacea, because Most utilities leave groups of keys in the registry indicating their presence on the computer, especially trial versions of products. To quickly and correctly remove not only programs, but also information about them, it is recommended to use PC Decrapifier. This product can be downloaded from the following link http://www.pcdecrapifier.com/download.
Launch the program by double-clicking the file with the .exe extension (no installation required). A message will appear in the window asking you to create a restore point. If you don't want this, click Next.
Then the program will scan the system for the presence of programs, not even ignoring various add-ons (including service packs). In the list of utilities you will see a column containing the names of the development companies - this allows you to quickly determine the need for software.
Select programs by checking the boxes on the left side of the window and click Next. Uninstallers for each of the selected programs will appear on the screen in turn, in which you need to press the “OK” or Yes buttons. Quit PC Decrapifier and restart your computer.
Related article
If your laptop is infected with a virus, it is not wise to reinstall the operating system on it. It is quite possible that the license for the antivirus has simply expired, it has stopped updating and is no longer able to cope with new malware.

Instructions
If a virus blocks the computer and prevents you from using the Internet (and possibly all programs in general) and requires you to send an SMS, go to the following website: https://www.drweb.com/xperf/unlocker/. Enter the phone number to which you need to send a message, and in response you will receive a code that you must type in the input field of the malicious program. Laptop without sending a message, but in the future you will still need to remove the virus from it.
Make sure that the license for the old antivirus has actually expired. If it turns out that it is still working, but it takes a long time, connect the machine to the Internet, then update and fully scan all disks for viruses.
If it turns out that your antivirus license has indeed expired, launch the Control Panel program, and then select Add or Remove Programs. Find the old antivirus in the list and remove it.
After you have unlocked the machine and removed the old antivirus from it, install a new one on it. It should be free - then you will never have to worry about renewing your license for it again, and it will always be updated. The AVG Free package is recommended for home users, but according to the license terms, it cannot be used on a corporate machine. You will have to use PC Tools Antivirus Free. You can download them from the following sites: http://free.avg.com/http://www.pctools.com/free-antivirus/.
The most radical way to ensure further protection against viruses is to install the Linux operating system on it. Although malware exists for it, there are several orders of magnitude fewer of them. If you are forced to use programs that do not work in Linux, install two operating systems at once - Windows and Linux. Use the first only when you need to perform tasks for which Linux is not suitable, and run the second in all other cases, especially when you need to use the Internet.
Video on the topic
No matter how much the user loves order on the desktop and computer hard drives, over time unnecessary files, unused programs, temporary files, and installation log files accumulate. You can clean your computer of junk using the components designed for this purpose.

Last time we looked at it, but this time I’ll tell you how delete computer junk manually, by using Windows tools and programs.
1. First, let's look at where garbage is stored in operating systems.
In Windows XP
We go in and delete everything in the folders: Windows temporary files:
- C:\Documents and Settings\username\Local Settings\History
- C:\Windows\Temp
- C:\Documents and Settings\username\Local Settings\Temp
- C:\Documents and Settings\Default User\Local Settings\History
For Windows 7 and 8
Windows temporary files:
- C:\Windows\Temp
- C:\Users\Username\AppData\Local\Temp
- C:\Users\All Users\TEMP
- C:\Users\All Users\TEMP
- C:\Users\Default\AppData\Local\Temp
Browser cache
Opera cache:
- C:\users\username\AppData\Local\Opera\Opera\cache\
Mozilla cache:
- C:\Users\username\AppData\Local\Mozilla\Firefox\Profiles\ folder\Cache
Google Chrome cache:
- C:\Users\username\AppData\Local\Bromium\User Data\Default\Cache
- C:\Users\User\AppData\Local\Google\Chrome\User Data\Default\Cache
Or enter it in the address chrome://version/ and see the path to the profile. There will be a folder there Cache
Temporary Internet files:
- C:\Users\username\AppData\Local\Microsoft\Windows\Temporary Internet Files\
Recent documents:
- C:\Users\username\AppData\Roaming\Microsoft\Windows\Recent\
Some folders may be hidden from prying eyes. To show them you need.
2. Cleaning the disk from temporary and unused files using
Standard Disk Cleanup tool
1. Go to “Start” -> “All Programs” -> “Accessories” -> “System Tools” and run the “Disk Cleanup” program.
2. Select the disk to clean:

The disk scanning process will begin...
3. A window will open with information about the amount of space occupied by temporary files:

Check the boxes next to the partitions you want to clear and click OK.
4. But this not all. If you installed Windows 7 not on a blank disk, but on top of a previously installed operating system, you probably have space-consuming folders such as Windows.old or $WINDOWS.~Q.
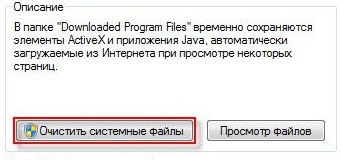
Additionally, it may make sense to delete system restore checkpoints (except the last one). To perform this operation, repeat steps 1-3, but this time click “Clean up system files”:
5. After the procedure described in step 2, the same window will open, but the “Advanced” tab will appear at the top. Go to it.

Under System Restore and Shadow Copies, click Clean.
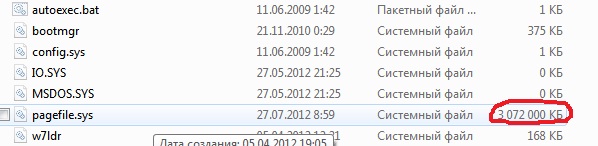
3. Files pagefile.sys and hiberfil.sys
The files are located at the root of the system disk and take up quite a lot of space.
1. The pagefile.sys file is system swap file(virtual memory). You cannot delete it (it is not recommended to reduce it either), but you can and even need to move it to another disk.
This is done very simply, open “Control Panel - System and Security - System”, select “Advanced system settings” in the “Performance” section, click “Options”, switch to the “Advanced” tab (or press the win + R key combination, the command “execute” will open and there type SystemPropertiesAdvanced) and in the “Virtual Memory” section click “Change”. There you can select the location of the paging file and its size (I recommend leaving “Size as selected by the system”).
4. Removing unnecessary programs from the disk
A good way to free up disk space (and as an added bonus, increase system performance) is to remove programs you don't use.

Go to Control Panel and select “Uninstall Programs”. A list will appear in which you can select the program you want to remove and click “Delete”.
5. Defragmentation
Defragmentation of a hard disk, carried out by a defragmenter program, allows you to organize the contents of clusters, that is, move them on the disk so that clusters with the same file are placed sequentially, and empty clusters are combined. This leads to increase speed access to files, and therefore to some increase in computer performance, which at high level fragmentation the disk may turn out to be quite noticeable. The standard disk defragmenter program is located at: start>all programs>standard>utilities>disk defragmenter

This is what the program looks like. In which you can analyze disk, where the program will show a diagram of disk fragmentation and tell you whether or not to defragment. You can also set a schedule for when the disk will be defragmented. This is a program built into Windows; there are also separate disk defragmentation programs, for example which you can download here:

Its interface is also quite simple.

Here are its advantages over the standard program:

- Analysis before disk defragmentation Do a disk analysis before defragmenting. After the analysis, a dialog box is displayed with a diagram showing the percentage of fragmented files and folders on the disk and a recommendation for action. It is recommended to carry out analysis regularly, and defragmentation only after appropriate recommendations from a disk defragmentation program. It is recommended to perform disk analysis at least once a week. If the need for defragmentation occurs rarely, the disk analysis interval can be increased to one month.
- Analysis after adding a large number of files After adding a large number of files or folders, the disks may become excessively fragmented, so in such cases it is recommended to analyze them.
- Checking that you have at least 15% free disk space To defragment completely and correctly using Disk Defragmenter, the disk must have at least 15% free space. Disk Defragmenter uses this volume as an area to sort file fragments. If the amount is less than 15% of free space, Disk Defragmenter will only perform a partial defragmentation. To free up more disk space, delete unnecessary files or move them to another disk.
- Defragmentation after installing software or installing Windows Defragment drives after installing software or after performing an update or clean install of Windows. Disks often become fragmented after installing software, so running Disk Defragmenter can help ensure peak file system performance.
- Save time on disk defragmentation You can save a little time required for defragmentation if you remove junk files from your computer before starting the operation, and also exclude from consideration the system files pagefile.sys and hiberfil.sys, which are used by the system as temporary, buffer files and are recreated at the beginning of each Windows session .
6. Remove unnecessary things from startup
7. Remove everything unnecessary from
Well, I think you know for yourself what you don’t need on your desktop. And you can read how to use it. , a very important procedure, so don’t forget about it!
As you use your computer, a large number of unnecessary files accumulate on its disk. If you do not clean your computer of this debris, then over time the computer will begin to work much more slowly. This is due to the fact that there is little free space left on the system disk and files are hard to write. In this material we will talk about how to remove garbage from your computer and return it to its former glory.
Step No. 1. Use the Disk Cleanup function.
If you want to clean your computer of junk, then the first thing you should do is use the built-in “ ” function. This feature is built into all versions of Windows, and it works quite well. In order to use this function, open the properties of the disk you need and click on the “Disk Cleanup” button. You can also run the Disk Cleanup function using the “cleanmgr.exe” command. You can enter this command into the Run menu or into the search form."
After clicking on the “Disk Cleanup” button, the operating system will start the disk analysis process. This may take a few minutes.

After the analysis is completed, a window will appear with a list of files that can be deleted. Opposite each item will be displayed the amount of free space that can be obtained by deleting these files. Here you need to check the boxes next to the files you want to delete and click on the “OK” button.


After clicking on the “Delete files” button, the operating system will begin deleting.

As a result of such cleaning, you can free up to several gigabytes of free space.
Step No. 2. Use a special disk cleaning program.
Another way to clean your computer of debris is to use a special computer cleaning program. Now there are a large number of such programs. One of the most famous is the CCleraner program. This program performs the same actions as the Disk Cleanup function; it finds unnecessary files and deletes them.
CCleraner is very easy to use. All you need to do is check the boxes next to the files you want to delete and click on the “Analyze” button. After this, the program will analyze the computer and show a list of files that it has prepared for deletion. Next you need to click on the “Cleanup” button and CCleraner will delete all found files.

The CCleraner program interface consists of several tabs. The first tab is called "Cleaning". Here you can delete unnecessary files that relate to the Windows operating system itself or to installed applications. The next tab is called “Registry”. With its help, you can clean the registry from entries that are not relevant and are not needed by the operating system. The third tab is called “Service”. Here you can remove programs, disable startup programs, and perform other manipulations with files and disks.
Step #3: Delete or move user files from the system drive.
Another source of garbage is user files (files created by the user). In order to clean your computer of junk, you need to find user files that are located on the system drive. By deleting them or moving them to another drive, you can free up a lot of occupied space.
As practice shows, most often user files can be found on the desktop (folder C:\Users\Username\Desktop) or in the Downloads folder (folder C:\Users\Username\Downloads).

The above screenshot shows that the “Downloads” folder, which is located on the system drive, weighs as much as 21 GB.
Step No. 4. Remove unnecessary programs.
Today I will tell you how to easily clean your computer of junk, as well as how to clean the registry and temporary files. I think everyone, sooner or later, is faced with the fact that a computer, no matter how powerful and modern it is, sooner or later starts to slow down. There is no need to panic and take your computer for repair under warranty; I will tell you how to clean it of debris yourself.
To clean your computer and registry, we need CCleaner. There are many more similar programs, but this one stands out because even the most inexperienced computer user can handle it.
Installing CCleaner
You can download CCleaner from the link http://ccleaner.org.ua/. Since the program is free, it is offered to be downloaded on other sites, but on this site it will be downloaded for free and without SMS. Follow the link, then go to the “Download” tab and click on the first link.  After downloading, run the downloaded file. The installer window will open
  Select your native language (in my case Russian), and click “Next”
  This window asks you to select installation options. I left everything as is. Click “Install”
  The installation process begins, it lasts no more than 1 minute, wait for the installation to complete, which will be accompanied by the following information
  You can uncheck “About version” so as not to read technical information, then click “Finish” and wait for the program to launch. This completes the installation of the program. Let's move on to using the program directly.
Working with CCleaner
1. Cleaning temporary files
The first button in the program is the “Cleaning” button. In this block of the program, you can analyze how cluttered your computer is, and after analysis, clean it of everything unnecessary.
And so in the “Windows” and “Applications” columns, by default, the checkboxes are set for what will be analyzed, in principle, you can leave everything as is, or uncheck/check additional boxes. After you have decided on the checkboxes, click “Analysis” and wait for the data to be collected  Data collection can last from 30 seconds to 5 minutes, it all depends on the amount of garbage in your computer.
After completing the analysis, you will see something like the following:  Now pay attention to the second line of the analysis “Approximately 1069 MB will be cleared.”(!). Can you imagine how much garbage has accumulated on my computer? That's a whole gigabyte! After cleaning, not only will my computer run faster, but I will also have an additional gigabyte of free space on my hard drive.
So, moving away from the topic... In the analysis results, you can see what was most dirty on your computer. After viewing the analysis, you can safely press the “Clean” button. There is no need to be afraid that you will lose important data; CCleaner will only delete what interferes with your work and will in no case affect vital files.
After clicking on the “Cleanup” button, the program will ask you again “Are you sure you want to clear the data?”, without hesitation, click YES.  Ready! Cleaning is complete. Let's move on to the next point
2. Cleaning the registry of debris
Why do you clean the registry? In fact, the registry does not slow down the system, but it can negatively affect the operation of some applications or the system as a whole. You need to clean the registry if you notice that any programs that previously worked normally are not working correctly, or if you are unable to install any application that should definitely work on your computer. It also happens that Windows updates cannot be installed due to incorrectly removed previous updates. For all the cases described above, cleaning the registry will be, if not salvation, then at least hope;).
To clean the registry using CCleaner, click on the “Registry” block, leave all the checkboxes active and click “Search for problems”. Finding problems can take 10 seconds or more. up to several minutes.  After successfully searching for problems, click on the “Fix” button, the program will offer to save copies of the changes made - you can refuse.
  Then in the window that appears, click “Correct marked”, after cleaning, calmly click “Close”. Ready! Now your registry is clean, entries of unused applications, incorrect entries, as well as those that could lead to system interruptions have been deleted.
3. Service – working with programs and startup
In the “Service” block it is possible to carry out many manipulations with programs, the system and disks of your computer. 
- Uninstalling programs– A list of installed programs on your computer, here you can remove them and restore them in case of failures. – a list of programs that are loaded with your computer. If the computer freezes when the system starts, you should pay attention to this point.
- Search files– search for duplicate files on your system. You can set a specific mask by which to find all duplicates.
- System Restore– management of system restore points.
- Erasing Discs– overwriting disks to make it impossible to recover data.
CCleaner settings. How to clean your computer when the system boots
This is a very important point in the program that most users simply ignore. I will describe several very important points that will definitely interest you.
1. Cleaning the computer when you turn on the computer  This item is very convenient for those who often clean their computer using CCleaner. Now you don't need to worry, CCleaner will clean your computer itself upon startup (if you turn off your computer, of course).
2. So that when you turn on your computer you don’t even notice that the CCleaner program is running, go to the “Advanced” tab and check/uncheck the boxes as shown in the screenshot

That's basically it! This concludes the review of the computer and registry cleaning program CCleaner. If you have any questions, we will be happy to answer them. If you liked our review, click likes and write comments.
Good day.
Whether the user wants it or not, sooner or later any Windows computer accumulates a large number of temporary files (cache, browser history, log files, tmp files, etc.). This is most often called “garbage” by users.
Over time, the PC begins to work slower than before: the speed of opening folders decreases, at times it pauses for 1-2 seconds, and there is less free space on the hard drive. Sometimes, an error even pops up that . So, to prevent this from happening, you need to clean your computer of unnecessary files and other junk (1-2 times a month). Let's talk about this.
Cleaning your computer from junk - step-by-step instructions
Built-in Windows tool
You need to start with the fact that Windows already has a built-in tool. True, it doesn’t always work perfectly, but if you don’t use your computer very often (or there is no way to install a third-party utility on your PC (more about it later in the article)), then you can use it.
Disk cleaner is available in all versions of Windows: 7, 8, 8.1.
I’ll give you a universal way to run it in any of the above OSs.
Result: the hard drive was very quickly cleared of most unnecessary (but not all) and temporary files. All this took was min. 5-10. The only downside, perhaps, is that the standard cleaner does not scan the system very well and misses many files. To remove all garbage from your PC, you need to use a special one. utilities, read about one of them further in the article...
Using a special utility
In general, there are quite a lot of similar utilities (you can find the best ones in my article:).
In this article, I decided to focus on one utility for optimizing Windows - Wise Disk Cleaner.
Why on her?
Here are the main advantages (in my opinion, of course):
- There is nothing superfluous in it, only what is needed: disk cleanup + defragmentation;
- Free + supports 100% Russian language;
- The speed of operation is higher than that of all other similar utilities;
- Scans your computer very thoroughly, allowing you to free up much more disk space than other analogues;
- Flexible system for setting up scanning and removing unnecessary things; you can turn off and turn on literally everything.
Step by Step Actions

Defragmenting a hard drive in Windows 7, 8
In this subsection of the article it is necessary to make a small reference to make it more clear what we are talking about...
All files that you write to your hard drive are written to it in small pieces (more experienced users call these “pieces” clusters). Over time, the spread of these pieces on the disk begins to grow rapidly, and the computer has to spend more time reading a particular file. This moment is called fragmentation.
In order for all the pieces to be in one place, arranged compactly and quickly read, you need to perform the reverse operation - defragmentation (in more detail). This will be discussed further...
By the way, you can also add that the NTFS file system is less susceptible to fragmentation than FAT and FAT32, so you can defragment it less often.
Standard optimization tools

Using Wise Disc Cleaner

By regularly cleaning your computer of junk, you not only free up disk space, but also speed up your work and the operation of your PC.
That's all for today, good luck everyone!


